Here's my piece. It still needs quite a bit of polishing, but I'm fairly happy with the general timing and poses.
I finally got around to getting the last two segments in there (reaction to the voice and the girl herself). I made the mistake of not blocking that out from the beginning (partially because I hadn't made a choice as to how I wanted that end section to go). I like the basics of the end now, but I'm not sure about the tone. I have the woman reacting quite negatively to the girl, I like the contrast of that choice, but I'm not sure yet if it fits the piece overall.
Though this is the end of the semester, I look forward to finishing this piece over the coming weeks. Left to do: finalize the acting choices for the end, proper arm sway, faster eye movement (I really want the eyes to dart around), overlap of course and some subtle expression work throughout. Oh, and the lipsync. I spent so much time trying to have the characters speak with their body language, I only tackled a small section of the actual lipsync.
I feel I've learned an incredible amount this semester, this class is what I've been waiting for.
Tuesday, December 15, 2009
Monday, December 14, 2009
MOVIE FILES DUE BEFORE NOON
We are having our final dailies tomorrow at noon in the final review room. Files must be in drop off folder ready to be viewed by noon tomorrow,Tuesday December 15th or they will be marked as late. See you then!
Friday, December 11, 2009
Thursday, December 10, 2009
Monday, December 7, 2009
Week 14 Am I Done Yet?
Activity: Presentation of 'Close to Final' Work
Notes: For final polish, dirt and noise in curves can be added on layers.
Assignment: Finish Animation!
Billy CA Root Comparison
Before ----------------------------- After
I asked Tony to post this to the blog to show how important the root node is in keeping the characters alive. Even during a hold, there is some circular movement in the hips so that the character will sway back and forth, and up and down. Remember that life is your best teacher, so study your reference! I asked Tony to load his reference into the image plane, and track the motion of the root. The result is what you see on the 'after side'. Another observation Tony made was that moving the shoulders helped to give the rib cage a sense of compression (squash) and expansion (stretch), as the character moved from pose to pose. This gives a more natural feel to the poses. Lastly , after the root smoothing was established the waving arm gesture for 'It's Billy California' was delayed, slowed down and staged more in front of the character so that it would read better. Even though you are studying reference closely to understand the mechanics of movement, it is used as a reference and not copied exactly.
Thursday, December 3, 2009
Tuesday, December 1, 2009
Week 13 The Checklist
Activity: Dailies in the Final Review Room
Watch Richard Williams DVD, Accents and settling.
the DVD has examples of 4, 5 and 6 frames accents for arms, and head.
Demo: Tony showed a before and after comparison, adding movement to the root node of the character to give a sense of weight, and adding life to places where the characters are standing still.
Notes: In the first part of the semester, we explored the broad strokes of blocking, posing and timing of a scene with two characters. Be Simple, Be Clear, and Put everything where you can see it. In the second half of the semester we have been adding in the details of lip sync and facial animation, while polishing off the rough edges in the construction that got us this far. We have been fortunate enough to have watched several of the Richard Williams DVDs on Dialogue and Accents as well as James Baxter on Dialogue, and Michael Caine on Acting. We have learned that using reference, whether it be from a good actor, or acting out the scene yourself is invaluable in studying and understanding movement. To quote Michael Caine: If you see something from a good actor, steal it. Chances are they stole it from someone else. Study your reference until you know it inside out. Don't wing it!!!! Don't be afraid to load your reference into the image plane and track some of the movements, or step frame through your reference movie files. By running dailies we have also learned to keep the door open to contributions from everyone on the 'team'. Animation is a team sport. Be open to input and be flexible enough to make changes. If you get a good idea late in the process, don't be afraid to try it out, especially if it helps the overall storytelling and performance. Stand back and see how the whole thing is working, then jump back into the details, back and forth. Don't hesitate to try these relatively big experiments at this late stage. If in doubt, create two versions for comparison, resorting to what is almost blocking for the new ideas.
ASSIGNMENT : Work on Scene adding final details.
Here is a checklist to get a production level quality of polish.
- Good Keys for clarity. Strong poses that read well in silhouette.
- Anticipation Action Reaction. To quote Chaplin 'Show the audience what you are going to do, do it, then show them you've done it.
- Overlapping Action. People 'unfold'. Lead the action with the head or the hips. Pupils lead the head turns. Add a breakdown drawing if offsetting it in the graph editor doesn't give you the desired effect.
- Shoulders Remember the rib cage compresses and expands. Moving the shoulders as part of the performance can help create this effect. Shoulders are also useful to create a sense of breathing. Use shoulders when raising an arm. Lift the elbow, then wrist, then the shoulder.
- Arcs All the joints move based on rotations, which should naturally give you arcs in the movement - check them from your final camera, by tracing them using a 2D drawing tool. IK joints are quick to pose, but you need to do a lot of arc work that you get automatically with FK.
- Accents - Head Body Hands Hit the accents 3-4 frames early.
- Hand poses, overlapping the fingers from each other, then overlapping each finger joint. Try to avoid a feeling of underwater swaying with the overlapping of the fingers, a little overlap can go a long way. Bend the wrist as part of the hand pose.
- Vibrations and Settling
- Head Accents to make the characters look like they are talking. Nods and shakes.
- For Dialogue we are progressing it somewhere
- Movement in the hips (root node), to give the character a sense of weight
- Eye Direction Use the lid rotate controls to change the shape of the eyes, based on eye direction. Eyes are incredibly flexible in how they change shape as you look around. Be aware of this, and push it to give the eyes an organic feel. Be aware of how the shape can change from one eye to the other. Try to get some rhythm into it that is reflected in the brows, cheeks and mouth. If all the parts of the face are not tied together it can look like a mess.
- Brows
- Eye Scans
- Eye Blinks Make sure the eyes close completely on the blinks. You may have to dial out other eye shapes during the blink. Use half blinks as well as full blinks, like a flutter. Good for eye flick direction changes, to have something in there. Think about using the lower lids (wink) as well as the upper lids. It's a decision based on how the character is emoting, what kind of a blink you're after. Consider using the brows subtlety during an eye blink, to tie all the parts of the face together. The rate and rhythm of eye blinks are part of the personality of the character.
- Breathing
- Facial expressions Change expression before or after a big move to make the character look like they are thinking.Choose a time when the character is fairly still to make the expresssion change. Use Asymmetry and tie all the parts of the face together. Use the jaw and brows to get a sense of squash and stretch .Don't have everything in the face change at the same time, or it will look mechanical. Play with breakdowns, mouth first, then eyes. Eyes first, then mouth. These things overlap and are offset. Timing of these transitions is important. Add dirt in the curve for long transitions, like a slow eye brow raise. This is in the final polishing of the scene.
- Lip sync Be careful not to over articulate. Remember a lot of syllables are just transitions between the big ones, and can be dialed down or taken out. The key is finding the correct jaw rhythm and that will give the snappiness to the dialogue. Use interesting mouth shapes that reflect the personality of your voice. Hold the consonants for 2-3 frames. , open the jaw quickly for the vowels to get some snappiness to the animation. A lot of mouth shapes are preparing themselves half way through the previous syllable, like a pucker. Analyze what your mouth is actually doing when you speak. Fine tune and double check your lip sync animation using the face cam, or you might get some bad surprises on the big screen!
Sunday, November 29, 2009
Miurika shares some gems from the CTN Expo
These videos wereposted in youtube by Jeremy Hopkins.
Eric Goldberg talks about Ken Harris
Eric Goldberg talks about the benefits of pose to pose in CG animation
Eric Goldberg talks about the benefits of pose to pose in CG animation part 2
Eric Goldberg - What's missing in CG and hand drawn reels.
Eric Goldberg talks about Ken Harris
Eric Goldberg talks about the benefits of pose to pose in CG animation
Eric Goldberg talks about the benefits of pose to pose in CG animation part 2
Eric Goldberg - What's missing in CG and hand drawn reels.
Saturday, November 28, 2009
Extra workshop class Monday November 30, Room 350 9 am to noon
HAPPY THANKSGIVING EVERYONE!
DROP YOUR FILES INTO THE DEC.1 DAILIES FOLDER, IN THE STUDENT DROP OFF BY 11:45 AM on TUESDAY AT THE LATEST.
Please meet in the final review room (353) at noon on Tuesday for a one hour dailies . This room is being used for final reviews this week, so we will probably need to wrap dailies by 12:45.
If you can, please arrive 10-15 minutes early, and have your files ready to view.
Thank-you!
Tuesday, November 24, 2009
Week 12 Dailies Etiquette
Topic: Dailies Etiquette
Lecture/Demo: Addressing comments given in dailies by your instructor/animation director. Make two versions if you disagree. Being open to feedback is crucial in a production environment, so start making your professional habits now.
Activity: Dailies: critique animations in final review room
Assignment: Work on scene addressing notes from Dailies
Notes: Attitude
- No Ego
- Open to Feedback
- Communication with Others
- Contributes to Dailies
- Is open to Critique (from anyone)
- Wants to push ideas ... Is it the most entertaining way ???
- Takes notes
- Ask Questions
Monday, November 23, 2009
latest
This is my latest version. I think the lips sync looks good and i have been working at offsetting and smoothing out the movements.
Wednesday, November 18, 2009
POST YOUR 'CLOSE TO FINAL ANIMATION'
As we are into our last 4 weeks of class, please post new movie files from now on, instead of replacing old ones. We are getting a great collection of work in progress pieces on the blog, showing the entire process. Let's keep these older posts, so that we have a record of the progression on these scenes. Thanks everyone!!!
Please join the 'realistic animation' class for a guest lecture, Thursday November 19th
Bryon Caldwell, animator from Image Movers Digital
Room 350, at noon
Saturday, November 14, 2009
Wednesday, November 11, 2009

Tuesday, November 10, 2009
Week11 WIP from Ben UPDATED
Blocking
Facial Cam
Reference for He
video source from internet, for study purpose
Reference for She
video source from internet, for study purpose
by Ben, Updated on 17 Nov 2009
Monday, November 9, 2009
Weeks 10 and 11 Smoothing out the animation
Topic: Smoothing out the Animation
Notes: work from the root outwards
Changes are still ok at this stage, it's all about getting the best performance!
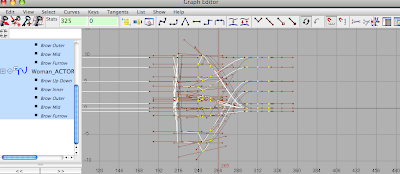
Lecture/Demo: Working in the graph editor to smooth out your animation. Adding breaths and eye darts.
Activity: watch making of Charlie Chaplin film 'City Lights' documentary
Homework: continue to smooth out the animation. Add eye darts and breathing to help bring the characters to life.
Tip: Did I mention using reference for your characters?!! Study the great actors. Get some of their mannerisms into your characters.
By now you should be into the final steps, getting into the finessing and polishing of the animation. You will be constantly refining, while still being open to last minute acting ideas that can make the overall piece stronger. On these refining passes work in the graph editor to smooth out the body movements. Get rid of what you don't need and try to build smooth graceful curves. Go back to the root first, as this moves everything else, and work your way up the spine checking all your curves. Do frequent passes on the eyes and eyebrows , since in the process of smoothing, the head and body poses will change.
Thursday, November 5, 2009
Extra Studio Classes
Monday November 9th
Room 350, 9 am to noon
Friday November 6th
Room 350, 9 am to noon
Monday November 2nd
Room 350, 9 am to noon
Tuesday, November 3, 2009
Wednesday, October 28, 2009
Week 9, notes on approaching mouth action
This will be a studio class, where we will use class time to work on our shots
Homework: Animate the mouth actions. Using your phoneme library, plug in the mouth shapes, using the same key frames as the jaw. Use the 'face camera'.
1. Anticipate dialogue with head, body or gestures 3-4 frames ahead of the heavy modulation but mouth sync should be right on the modulation. If it is a closed mouth, it will be on the consonant, and, if possible remain closed for two frames in order to be seen.
2. You need interesting mouth shapes that reflect the personality of your voice. Look for shapes that give you an extra touch of character and are peculiar to this one personality.
3. Try to show enough time on the important shapes so that the viewer will be aware that he has seen a picture of the word.
4. On holds at the end of a phrase or a line of dialogue, try to retain a mouth expression that reflects the word or phrase. Retain the character of the shape in the hold with a softening action to keep it alive.
5. There are not too many straight in betweens in dialogue. You may want to retain one mouth a little longer and then move quickly into the next one, or vice versa. Either way you will favor one extreme over the other - both in timing and the shapes you choose (draw).
6. If you have a word that has been stretched out fairly long, treat it like a moving hold.
7. When using the eyes only for sync in an extreme closeup, start the eyes into the move at least three frames ahead of the accent. If the accents are strong lead by 4-5 frames.
8. When using a blink to get the sync, the eyes should close ahead of the accent by 3-4 frames.
9. If you are going to start your dialogue on a drifting or slow move without an anticipation, it helps to start this movie 3-8 frames ahead of the accent.
10. There are times when your dialogue will have to be on ones.
11. The vowel sounds, A E I O U always will require some opening.
12. The consonant sounds M P B are all closed mouths. Keep in mind that the mood of the character will determine the shape of the mouth. Generally mouth shapes that have the "E"sound show teeth. T and G also can pucker like a U. Y and W can go in a very small O or U shape.
13. Make sure the teeth are not painted white or they will flash. This can be particularly annoying if the mouth is over articulated.
Tuesday, October 27, 2009
Blocking update
10-27-09
Another update. I've been working on the blocking of the male character, (I really need to name these characters!), I needed to finalize his actions. Right now he's a bit too "drunk". Linda gave me some suggestions on how to simplify his movements in the latter section.
I'm working on getting the main pose for that section working and then I'll make sure to integrate it with the poses before and after. Next I'll be working on fixing his hips, I need to add weight shift and I also need to make sure the feet are in the right locations (supporting his weight).
After that I'll do a pass on his arms, it's stilly that I haven't tackled those yet, but I really wanted the main body moves and expressions nailed down first. I also need to go back in to the jaw movement and rework it.
And then I'll do the same for the woman, I'm at least happy with her actions. I still need to add her reaction to the latter part of the piece.
-justin owens
Week 8 Midterms are here!
Activity: Watch Richard Williams DVD, Dialogue part 2
Tip: According to Richard Williams, Jim Henson doesn't have 1/3 of the material than we have and he's doing a better job of the lip action than we are. Why? The secret is
PROGRESS THE ACTION. GO SOMEWHERE.
Jim Henson, has the puppets either going backwards forwards, he's going somewhere. And somehow with the opening and closing of the mouth he gets it pretty good!
Please make sure to post your midterm work in progress animation on the blog for midterm grades.
Homework for next week:
Animate the jaw. Think about the phrasing. On the second and third pass, try to tone down the chatter and focus only on the key phrases where the jaw is open.
Finish your phoneme library. Keep it simple. Even with a limited number of controls try to create interesting mouth shapes that reflect the personality of your voice. Create asymmetrical shapes that give you an extra touch of character and are peculiar to this one personality. Find an actor to use as reference for your character, and try and get their mannerisms into your character.
Use your exposure sheets! Write down your keys for the dialogue. Use the extra columns for thumbnail sketches.
Refine and add head accents. Subtle movements over the main poses. Hit accents early. Head accents at least 3-4 frames early. Head accents can be modified in the graph editor. Act it out, and look at reference.
Use reference for your characters. Study the great actors. Get some of their mannerisms into your characters.
extra class: Monday 9 am to noon, room 350
Notes: hit all accents early by 3-4 frames, progress the action.
Demo: Animating the jaw using the graph editor. Adding head accents using the graph editor.Tip: According to Richard Williams, Jim Henson doesn't have 1/3 of the material than we have and he's doing a better job of the lip action than we are. Why? The secret is
PROGRESS THE ACTION. GO SOMEWHERE.
Jim Henson, has the puppets either going backwards forwards, he's going somewhere. And somehow with the opening and closing of the mouth he gets it pretty good!
Please make sure to post your midterm work in progress animation on the blog for midterm grades.
Homework for next week:
Animate the jaw. Think about the phrasing. On the second and third pass, try to tone down the chatter and focus only on the key phrases where the jaw is open.
Finish your phoneme library. Keep it simple. Even with a limited number of controls try to create interesting mouth shapes that reflect the personality of your voice. Create asymmetrical shapes that give you an extra touch of character and are peculiar to this one personality. Find an actor to use as reference for your character, and try and get their mannerisms into your character.
Use your exposure sheets! Write down your keys for the dialogue. Use the extra columns for thumbnail sketches.
Refine and add head accents. Subtle movements over the main poses. Hit accents early. Head accents at least 3-4 frames early. Head accents can be modified in the graph editor. Act it out, and look at reference.
Use reference for your characters. Study the great actors. Get some of their mannerisms into your characters.
extra class: Monday 9 am to noon, room 350
Saturday, October 24, 2009
Friday, October 23, 2009
Thursday, October 22, 2009
Monday, October 19, 2009
Wednesday, October 14, 2009
Week 7 jaw animation, phoneme libraries
--------------------------------------------------------------------------------
Note: Get a solid pass on the posing and timing before you begin offsetting your animation. It is extremely difficult to adjust poses once you have started offsetting the curves.
You may follow along on this weeks class 'jaw animation and phoneme libraries' even if you have not yet started offsetting and overlapping your animation.
Animations may be in final blocking for mid-term grades.
----------------------------------------------------------------------------------
Activity: Watch James Baxter DVD on facial animationNotes: Facial expressions and adding asymmetry. How to animate a blink. When to add a bit of brow movement to accent a blink. Take notes when watching the DVD. Set up face cam.
Demo: Animating the jaw. Sound breakdown, use of exposure sheets, finding keys for mouth shapes. Putting together a simple phoneme library.
Recommended book: The Artist's Complete Guide to Facial Expression by Gary Faigin

jaw animation curve
Sample phoneme library
0 - neutral jaw closed
1 - neutral jaw open
2 - AH ("call")
3 - AY ("say")
4 - a ("hat")
5 - EE ("see")
6 - E ("them")
7 IH ("it")
8 OH ("no")
9 OO ("took")
10 OO ("shoe")
11 UH ("up")
12 D,T
13 G,K,NG
14 L
15 M
16 B,P
17 B,P cheek puff
19 N
19 R
20 SS,Z
21 SH, CH J
22 TH
23 V,F
24 W (use shape for OO)
First go through the mouth controllers available for your character, becoming familiar with each controller. You will use these to sculpt the mouth shapes for your phoneme library.There are infinite possibilities on how the shapes will look. (For example an EE on one side of the mouth).
Be Organized! Decide which shapes move similar parts of the mouth. Use these shapes together when sculpting your final phoneme mouth shape. Find the shapes that include the cheeks, and those that don't.
Decide if there are any shapes that are 'overall shapes' that are not specific to dialogue. Do not key these when creating your face shape library.
Tip: do not include the jaw up down as part of the phoneme. Animate the jaw on a separate pass, and use the same keyframes for the phonemes. Store your animation library poses in the negative frames. Go to the phoneme you want. Select all the controllers, unselect jaw up down, right mouse to your key frame and save key. Check for overall shapes being used for expression. These may need to be dialed out during dialogue
Find the rhythm of the dialogue, Start with the jaw.Don't enunciate each syllable. Some syllables are transitions.
'that's a lot'. The word 'a' is a transition. Shapes from the library are made from different sets of controls. Watch out for over enunciated words and pops. The mouth has to get into position to say something. You need a lead in (8-9 frames). "How are you" The mouth has to be prepared for the 'h' ahead of time'. You are dealing with 1/24 th of a second. You don't want to be late! Pop the mouth open before the sound by 1-2 frames. B's and P's are closed for 2 frames, modulated. Move the jaw so that you don't get a nasty stick.
Week 6 Continued Facial expressions and eye blinks
If you have not already done so, add more detail to the facial animation by adding the mouth expressions that are driven by emotional changes as opposed to dialogue. Sad to happy etc. Use the same keys as the brows where possible. Add new keys if necessary. Study your reference carefully! Pay particular attention to the use of asymmetry to achieve a more natural expression. Now is a good time to add eye blinks. Blinks are a great device in signaling a change of emotion in a character.
Homework: Start a conversation with somebody and watch when they blink.
Eye Blinks: Notes from 'IN THE BLINK OF AN EYE' by Walter Murch
Our rate of blinking is geared to
- our emotional state
- the nature and frequency of our thoughts
Even if there is no head movement the blink is
- something that helps an internal separation of thoughts to take place
- an involuntary reflex accompanying the mental separation that is taking place anyway
Start a conversation with somebody and watch when they blink.
- they will blink at the precise moment when the listener realizer our introduction is finished and now we are going to say something significant
- it will happen when they feel we are winding down and not going to say anything more significant for the moment
We entertain an idea, or a linked sequence of ideas and we blink to separate and punctuate that idea from what follows.
There are places in a conversation where it seems we almost physically cannot blink or turn our heads since we are receiving important information, and there are other places where we must blink or turn away in order to make better sense of what we have received.
quote from Gene Hackman "the Conversation"
"If it is true that our rates and rhythms of blinking refer directly to the rhythm and sequence of our inner emotions and thoughts, then those rates and rhythms are insights into our inner selves and therefore as characteristic of each of us as our signatures. So if an actor is successful at projecting himself into the emotions and thoughts of a character, his blinks will naturally and spontaneously occur at the point that the character's blinks would have occurred in real life."
Tuesday, October 13, 2009
Week 6 Offsetting the curves
Topic: Offset the animation
Notes:
Lecture/Demo: Adding offset and overlap using the graph editor
Activity: Dailies: Critique blocking
Homework: begin offsetting the animation
To quote Richard Williams, 'people unfold'. Some parts of the body lead the motion, and other parts follow. Things don't all move at once.
One method of adding offset and overlap is to use the graph editor. For this method it is best to focus on one section of animation at a time. Grab the curves down the spine and offset from the root for actions led by the hips. Grab the curves from the head down to the root for movements led with the eyes. There will be a lot of experimentation at this point. Try things out. The torso has more weight than the head. Make the movement of the head quicker than the torso. If you don't do this, then your characters will feel weightless and puppet like. Create playblast quicktime files to look at the result. Continue to shift timings. Once you have worked the entire animation in sections, create a playblast of the entire animation. Now you may see things that you didn't notice before. Make the fixes and adjustments, and create a new playblast. Repeat this process as many times as necessary to get a full overlapping pass for both your characters.
Friday, October 9, 2009
Sunday, October 4, 2009
Week 5 Blocking continued
Topic: Reviewing the rough animation, phrasing actions and poses
Notes: Phrasing actions and poses to dialogue beats. ‘Phrasing’ is defining beats in your shots. Sometimes we need to combine beats so that the scene is not ‘over animated’. Other times we need to emphasize beats to make the acting clearer.
Lecture/Demo: Adding counter balance to the rotation of the spine, based on the movement of the root.Working out the movement of the feet, even if they are offscreen.
Activity: Watch Richard Williams DVD Dialogue 1, Phrasing actions and dialogue
Dailies: Critique blocking
Assignment: finish blocking
Animating Dialogue
When you are planning the acting remember: We're not illustrating words, we're illustrating thoughts. The expression chosen is illustrating the thoughts of a character and not the words he is saying.
Listen to the track and visualize. Look for a change of attitude. Look for Humor and Entertainment. Be sure you have the right staging to show all the expressions in your scene to the best advantage.
Keep it simple and have fun!
This week we are working towards final blocking.
As you are refining your poses:
- Add head nods, ground the action all the way down the spine. Copy the curves to the chest and hips, and scale them down.
- Add counter balance to the rotation of the spine, based on the movement of the root.
- When the hip is tilted right, the chest counter rotates left for balance. If necessary, work out the movement of the feet, even if they are offscreen.
- Keep movements snappy - less time on inbetweens, more time on the poses.
- Rework and refine the poses for the arms, repositioning if need be while keeping the timing intact.
- Block in facial expessions. So far we have worked with the brows and eyes. Add mouth movements that are driven by emotional changes (as opposed to dialogue). The expression must be captured throughout the whole body as well as in the face.
- Adjust the timings of the poses to work with the dialogue more properly. Anticipate dialogue with head, body or gestures 3-4 frames ahead of the heavy modulation (accent)
- Lock down the poses. Remove any unnecessary movements, exaggerate and hold poses as needed for clarity. Resist the temptation to tell too much in one 'drawing' (pose).
- Resist the temptation to begin overlapping before the posing and timing of the shot has been worked out!
ASSIGNMENT : final blocking for next week.
Friday, September 25, 2009
JLipSync Program
JLipSync is a Xsheet program that can help you map out you mouth phonemes (with a visual representation) to the waveform of you sound clip. Download the zipped program from the link below:
Instructions:
1. Open JLipSync.jar
2. File - Open - (change options to .wav file) - select your sound .wav file
After it is imported you should see the waveform in the upper section of the program.
3. Go to the desired frame (by scrubbing through waveform or selecting it in the xsheet section), double click on the desired phoneme on the left. You should see the picture in the upper right reflect your choice (and the phoneme description should be place in the frame on the xsheet).
4. Repeat through the entire sound clip.
5. Play and save.
If anyone knows how to attach files to a blog post (that aren't videos or pics) please let me know.
Tony
Week 4 eyes and brows
Demo: copying animation from root to spine. Adding Head nods. Beginning to rough out the gestures.
Demo: adding eyes and brows.
Do a pass with the eye movements.
Go through your entire animation, look for key moments of emotional change that are communicated through the brows. Key the upper and lower eyelids with the brows. Keep the keys together.
Working from the root outwards ....
Note from SIGGRAPH 2009 :
A time honored, classic technique used in animation is pose-to-pose. Landreth argued that humans don't actually move "pose to pose" so already the animator is setting up the characters in unrealistic circumstances. In The Spine, Landreth's featured short at this year's Siggraph, he was trying to push the boundaries of realism in animation even further. To do this, the animators were actually told not to use a dope sheet when planning their animation, which prevented the use of "posing." Instead, the animators were encouraged to take an "inside-out" approach when defining the character's movements. He suggested that they "inhabit the souls of the characters" and "do the motions to get into the body."
- Chris Landreth
Landreth then commented on the importance of gestures in animation. “Doing nothing excellently” is important to keeping your characters real. In the mid-60s, Andy Warhol did a series of “screen-tests” in which he sat a person in a chair and told them to “do nothing.” What emerged from these tests were incredibly engaging scenes that seem to have such weight and action in very subtle movements. Bob Dylan’s screen-test was particularly inspiring to Landreth’s study of realism. “Allow your characters to just simply exist.”
Tuesday, September 22, 2009
X-Sheets
Here's a link to one style of X-Sheet we can use, you can always do a google search if you'd like it in a slightly different format.
http://anishark.blogspot.com/2009/06/animation-x-sheet.html
http://anishark.blogspot.com/2009/06/animation-x-sheet.html
Saturday, September 12, 2009
Week 3
Topic: Blocking Root node only
Notes:
Lecture/Demo: Blocking out the shot from the root.
Activity: Dailies: Look at and Discuss reference movies
Assignment: Start blocking, root node only. Do a full pass on both characters.
File 1_rootblocking.ma
In the first movie file, you are blocking the full body movements, using only the root node.
File 2_body_gestures.ma
Start building the poses over the foundation of the root timing. Use the same frames as the root node. Using the graph editor, copy the movement of the root into the nodes of the spine. You will then need to remove some of the range of movement in the root, since copying the movements up the spine will multiply the effect. Rough out the arm poses, using the same keyframes. Don't worry too much about getting the poses for the arms looking perfect for blocking.
Goals for this week's Blocking;
- Size and placement of the characters in the scene
- Staging to best show the performance
- Choreograph the performances to work together and lead the viewers eye from one character to another during the dialogue piece
The viewer's eye can only be in one place at once.
Don't... have one character standing still, while the other character is talking, waiting for their turn to speak. Rather have them listening and reacting to what is being said. 'Do Nothing Excellently'. The trick is to keep it subtle. Sometimes the reaction of the secondary character is more important than the character talking.
Saturday, September 5, 2009
Week 2
This week we will be looking at reference and thumbnail sketches for your ideas.
Topics: Working with reference.
Notes: Finding the key poses.
Lecture/Demo: Acting out the dialogue and how to use reference
Activity: Improv with Radiostar : exercises to eliminate self-consciousness when
acting out your reference.To quote Michael Caine 'if you see a performance you like, steal it. Chances are they stole it from someone else'. Study the great actors. Act out the piece yourself by lip syncing as close as you can over the sound track. You can use the best parts from several bits of reference and put them together to use as your reference for animation.
Radiostar Improv leads a class at Yerba Buena gardens


1. Act out your reference and create a movie file.
2. Collect other clips of reference from movies/famous actors.
3. Finish working out your ideas using thumbnail drawings.
4. Get approval from your instructor for your choice of audio file and thumbnail sketches.
Once you get approval:
5. If you are using Norman, create modified Norman characters in costume as needed for your animation.
6. move onto week3 'blocking with the root node only'.
Thursday, August 27, 2009
Week 1
Topic: Research
Notes: Class Introductions, Grading Policies, Ground rules on assignments
Lecture/Demo: 1.Researching your subject. 2. How to pick a good piece of audio that tells a story and has subtext 3.Planning: What is the character saying, what is he really saying? ‘What should I have the character do?’ ‘How Can I best show it?’ Working out the cutting, staging and continuity.
Activity:Watch BBC master class on acting.
Assignment: Find an audio file and reference for a two character shot.
Create 2 pages of thumbnail sketches to show your idea.
No Animation this week.
Students may work on an individual shot, or using the anim jam method work with other students in the class to create a series of shots that can be cut together to make one long continuous piece.
Please check out the
'how to modify Norman' tutorial on aauanimationclub.blogspot.com
Dialogues for download - Radiostar Improv
Wednesday, August 26, 2009
Introduction
Introduction to ANIM 499 SPECIAL TOPICS
'LIP SYNC ANIMATION'
This course introduces students to performance in animation as well as working with dialogue. Your instructor will take you in detail through an entire shot from beginning to end. Students will follow along week by week completing their own dialogue piece. This in-depth study will explain techniques for making characters feel alive using the animation principles already learned as well as tips on polishing an animation.
The course is designed to help the student create a workflow for animating a shot. Please follow the naming conventions and use the workflow given in this course. We will be using a hierarchical approach where the performance is layered onto the basic movements of each character starting with the root, rather than a pose to pose approach where the key poses are created for all the nodes of the character then inbetweened.
Animators will be asked to use reference, but not to copy it. This class will emphasize acting and includes one improv class. The goal of the class is to create believable characters with an original performance.
As a result of successfully completing this course, students
Will be able to at an intermediate level...
- Create performance animation with speaking characters
- Create a feeling of empathy with the characters on the screen
- Work with the graph editor and other interfaces of the software
- Analyze performances and interpret in CG
- Create a workflow for animating a shot
Subscribe to:
Posts (Atom)